Debra Prinzing

Get the Email Newsletter!

A Floral Visit to San Diego

Saturday, December 15th, 2012

Rainbow Protea's just-harvested blooms - dazzling!

Earlier this week I was hosted by my dear friend and fellow Garden Writer board member Nan Sterman when I flew to San Diego to give a talk to the San Diego Horticultural Society. I love the title that Mary James  of SDHS gave my talk: “Bring me Slow Flowers” – a fun play of words on the title of my next book. Using images I’ve shot over the past several years, my lecture incorporated concepts from The 50 Mile Bouquet and Slow Flowers.

Here are the highlights of my (almost) 72 hours in San Diego:

Hasan Kayali, Ayse Kayali and me - walking on the beach at La Jolla Shores, just before sunset.

First, I visited Hasan and Ayse Kayali, some of our oldest friends from college days. My husband Bruce and Hasan were jumpers (long/triple) for Harvard’s Track Team back in the day and we never, ever get to spend enough time together. However, all of us were together in Tuscany in 2009, for a week at Villa Maddalena in the town of Montisi. That was pretty special. After a late, but delicious, lunch, we took a walk on the beach at La Jolla Shores.

After I said good-bye to the Kayalis, I headed to Encinitas, just a few miles north. Nan Sterman and Curt Wittenberg welcomed me with a flavorful Moroccan chicken dinner prepared by Curt, and we stayed up way too late just talking. Nan and I figured out that after this month (December), we will see one another in January (GWA Winter Board Meeting – Austin, TX); February (Northwest Flower & Garden Show – Seattle, WA); March (SF Flower & Garden Show – San Mateo, CA); April (when I’m back in San Diego to speak) . . . and of course, in August, when our GWA annual symposium heads to Quebec City. Nice to anticipate!

So exciting.....A visit to the uber-famous and very talented floral artist, Rene van Rems!

Nan and Rene are old San Diego friends in the floriculture-horticulture community.

On Monday morning, I headed over to Carlsbad, Calif., to visit the very famous René van Rems, a world-class floral designer and friend of Nan’s.

I’ve known of René because of his books (including René’s Bouquets: A guide to Euro-Style Hand-Tied Bouquets) and others. He is an internationally recognized designer, consultant and instructor, born in Holland, but based in San Diego for the past 30 years.

Rene's modern, colorful studio - where all the fun happens!

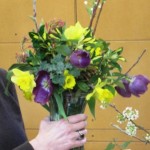
A "local" bouquet in the Rene van Rems studio - foraged Alder branches - perfect for the season.

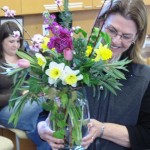
Last year, René established a new studio in Carlsbad, north of San Diego. I was so impressed with the interior space – as you can see here. It’s suitable for large-scale production for big events, for René’s many floral design workshops, and for private events. René considers himself to be in the “business of creativity,” and he loves to teach everyone – from the DIY flower-lover to the professional who participates in his advanced Master Classes.

René signed and gifted me two of his recent books — the hardback version of René’s Bouquets and his way-cool new book: Rene’s Bouquets for Brides. I felt a little inadequate giving him a signed copy of The 50 Mile Bouquet, but he was quite gracious about it. And, he was very kind to come and attend my lecture that evening. Please check out René’s beautiful work at his website, here.

This is the incredibly stunning landscape in Fallbrook, California - home to Rainbow Protea Farms

Nan picked me up around lunchtime and we headed out to Fallbrook, Calif., about 45 minutes east of Carlsbad. We were on a floral mission: To visit Rainbow Protea, an exotic cut flower farm that grows South African and Australian flowers in the Proteaceae family.

A special thanks to Dawn Bonner, whose family owns Rainbow Protea, and to sales & marketing whiz, Kim Jernegan, who hosted us. Kim loaded Nan and me into a pickup truck and we traversed the bloom-filled hills of the 198-acre farm on a brilliant December afternoon.

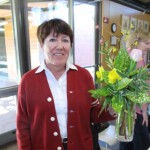
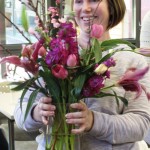
Kim Jernegan and me - holding stems of some beautiful Protea flowers.

Rainbow Protea began operations in 1985. While some may liken the hilly terrain approximately 20 miles inland from the Pacific Ocean and 60 miles north of San Diego as “similar” to South Africa, Kim begs to differ.

She points out that to grow thousands of flowering sub-tropical shrubs — Protea, Leucadendron, Leucospermum, Banksia, Leptospermum, Chamelaucium (Wax flowers), Anigozanthos (Kangaroo Paws) and other Mediterranean specimens — the farm’s crew has to use an auger-style drill and major amendments.

Those include primarily organic addititives such as fish fertilizers, worm compost, compost tea and kelp products.

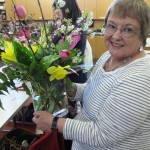
Enjoy my photographs of the plants that earned my affection.

Kim sent me home with a bountiful box of blooms, which I have been enjoying all week.

The wonderful thing about these exotic members of the Proteaceae family is that they are VERY long-lasting in the vase.

You need to re-cut the stems and refresh the H20 every two to three days; but then you can plan on having an exotic, modern-looking arrangement for weeks and weeks.

'Safari Sunset' Leucadendron

Protea 'Rosa Mink' - love the fuzzy margins on the petals!

Protea 'Pink Ice' - a silky-smooth variety

Protea 'Liebencherry' - vivid raspberry pink!

A hillside of Leucadendrons against the intense blue December sky. Unforgettable!

A Protea in bud - not sure of the variety, but it's sure gorgeous.

Good-bye Rainbow Protea. . . I'll be back!

Finally, I was welcomed by the members of the San Diego Horticultural Society. I felt like the room was filled with kindred spirits – gardeners who want to learn more about the plants they grow; people who are eager to try new things, including floral design. A great visit – and one that I will always cherish. Nan, Curt, Karen Bussolini (a writer/photographer friend who was in town, visiting from Connecticut), Bonnie Manion and I closed down the night with a late dinner at Il Forniao. Very satisfying!

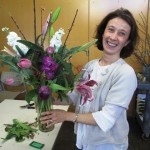
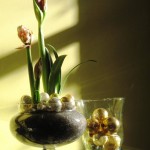
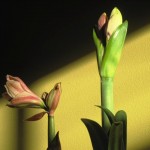
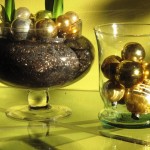
Before I left the following morning, I squeezed in a visit to fellow garden blogger Bonnie Manion of vintagegardengal.com. I first met Bonnie in 2009 when Country Gardens magazine asked me to write about her vintage container designs for spring bulbs. The story was called “Tour de Forced Bulbs.”

Later, after we moved from Seattle to Southern California, Bonnie and I finally met in person – and we had several fun adventures, including our day-trip to the Long Beach Flea Market with Lorene Edwards Forkner and Kathy LaFleur. Bonnie is an amazing designer, writer and winemaker (with her husband John Manion). While our time was short, I was tickled to spend a little time with her, touring their newly renovated home, barn, barrel room and more…and talking about the book-biz, blogging and gardening.

Look for exciting things coming from Bonnie in the near future, including a new book on keeping chickens!

Okay, enough for now. Please enjoy these photos and check out all the people I’ve highlighted in this blog post.


DIY Bouquets in Dallas

Thursday, March 1st, 2012


I spent a wonderful day with floral design students at the Dallas Arboretum.

First-time floral designers and experienced arrangers converged at the Dallas Arboretum and Botanical Gardens last Saturday for a few hours of inspiring floral creativity.

In planning the hands-on workshop with education director Joy Ijams, I worried that late February in Dallas could present some challenges. That is, when it came to procuring local and seasonal design ingredients. Fortunately for the 20 folks who participated in our sold-out class, my fears were allayed.

For the success of our event, I have several awesome people to acknowledge. First of all, thanks goes to Joy – the ever-upbeat program planner who invited me to speak about The 50 Mile Bouquet in a morning lecture and then to teach what she called a “make and take” workshop after our lunch break.

Education director Joy Ijams and I did a little “pruning” the morning of my class…to harvest branches and foliage for our student-designers to use.

It was Joy who creatively conjured up the format and got the word out to the Arboretum audience. It also was Joy who picked me up at the airport on Friday night and took me to Central Market so we could shop the flower department to augment our menu of botanical ingredients with domestic tulips and fragrant stock (she also suggested we undertake some ‘moonlight pruning’ at the Arboretum, but we were both exhausted and decided to wait until the following morning).

Joy, along with her education department colleagues and volunteers, made everything run smoothly. Our students were happy and engaged – and all the AV systems worked to perfection.

The following morning, prior to the arrival of those attending the 10 AM lecture, Joy and I headed out to the Arboretum’s display gardens with Felcos in hand. We were motivated by a concern that we wouldn’t have enough greenery otherwise. Sorry, Jimmy, but we harvested from the fringes of your borders, including clipping from the back sides of Indian hawthorn, just-blooming forsythia, phlomis, and rosemary. Oh, and a few minor branches from a saucer magnolia. 

Texas cut flower grower Cynthia Alexander is not only a great farmer, she’s a talented floral designer!

We were in pretty good shape with our supermarket flowers and the just-cut foliage. That’s because we knew Cynthia Alexander of Quarry Flower Farm was soon to arrive with goodies from her fields and orchards. In anticipation of this class, I had reached out to several of the Dallas area members of the Association of Specialty Cut Flower Growers (ASCFG) and connected with Cynthia, whose farm is located in Celina, Texas. She did not disappoint!

Cynthia agreed to harvest everything she had on hand and bring it to our class. Yes, it’s still early spring on Cynthia’s rather young flower farm, but you’d never know it by the fabulous, overflowing galvanized French flower buckets she delivered.

They contained an awesome mix of spring bulbs (several daffodil varieties); uncommon foliage (cardoons, hoar hound, and other green boughs); and lots of flowering fruit-tree branches. I’m so pleased that Cynthia joined us.

Floral design – en masse – in a classroom filled with passionate and creative women.

It allowed me to introduce her farm to students in both the morning and afternoon class. Plus, she participated in the floral design workshop – and inspired all of us with her avant-garde creation! As soon as Cynthia walked into the classroom, I recognized her; we realized that we must have met or at least spoken with one another at the 2010 Tulsa ASCFG conference. This time, we’ve become more than passing strangers and I can’t wait to return to Dallas to see Cynthia’s farm first-hand.

My “dream team:, from left: Joy Ijams of The Dallas Arboretum; Debra Prinzing (me); Cynthia Alexander of Quarry Flower Farm; and Whitney White, new-generation floral designer.

A few other secret ingredients enhanced the Saturday afternoon workshop — more fresh-from-the-garden floral elements and a talented florist (read on to discover to whom I’m referring). First, Joy and I had asked those who wished to do so to bring cuttings from their own gardens – and wow, what a great selection of foliage arrived! Second, I was sent an “angel” in the form of Whitney White, a twenty-something floral designer whose father Jay White is a fellow member of Garden Writers Association and an email pal of mine. Whitney arrived like a dream….Jay encouraged her to attend the morning workshop and as soon as we met I recruited Whitney to help with the afternoon class. It was nice to have her talent and that of a few other pro’s in the class to share tips about composition, line, form and color. I can’t wait to see where her career takes her. Currently, Whitney is working for a hot Dallas design firm called Bows and Arrows. They are very lucky to have her!

Once all our ingredients were assembled, I started out the class by discussing my favorite “green” floral design techniques:

  • Use a recycled or repurposed vase
  • Stabilize stems with organic or re-usable material, such as an armature of branches or twigs, wood aspen (Excelsior), old-fashioned flower frogs, chicken wire and a foliage nest.
  • Strip all foliage from the portion of the stem that will be under water; fresh-cut ever stem and plan on refreshing the water every day or two.

The students exceeded their own expectations with a beautiful lineup of designs. You can see some of their examples here.

Bottom line: Gardeners are ideal floral designers. We know the form, habit, bloom time and character of the ingredients in our gardens. And so we know how and when to harvest those ingredients — and arrange them in companionable displays in a vase. Perhaps this is an unscientific, alternative approach to floral design. But it makes sense to me! When you use seasonal ingredients, then they will naturally look like they belong together in a vase.

Here’s a lovely gallery of the local-seasonal-sustainable designs that filled our vases:


Happy Amaryllis!

Sunday, December 11th, 2011
Poetry in a bloom

Here’s a lovely amaryllis that I potted up to enjoy in our dining room this month. I can’t say enough about the beauty of every Hippeastrum hybrid I see this time of year. There have been many holiday seasons when I am super organized, and have planned ahead to purchase the bulbs, plant them in decorated pots and nurture them to bud-stage for hostess gift-giving.

This was not one of those years. Instead, I purchased two amaryllis already in bud stage from Cascade Cuts, a wonderful grower who is now selling herbs and potted plants at the Seattle Wholesale Growers Market. You can see how I planted the ‘Joker’ hybrids here.
The flowers I chose are mostly white with red streaks. In Starr Ockenga’s marvlous, photo-filled book called Amaryllis (Clarkson Potter, 2002), there are several varieties of these candy-cane style blooms. Not ‘Joker’ but enough alternate varieties to wow you for holiday decorating or gifting.
As I said, I purchased 2 potted amaryllis about a week ago, but I didn’t know how I was going to display them until yesterday. I attended 2nd Saturdayz, the monthly indoor vintage flea market, with my friend and design muse Jean Zaputil.
We found all sorts of fun stuff, from a 1950s plastic light-up Santa (Jean) to red and green-handled wood rolling pins (me – for my culinary essayist-friend’s surprise Christmas gift). And then I found a pretty piece of glass for $15. It has a nice footed base and graceful lines. I guess you could serve a trifle in it, or perhaps display it filled with vintage glass ornaments, as I found it.
But once I came home yesterday, I started thinking: “Why not plant my 2 amaryllis flowers in this beautiful vessel?” Who says you can’t put pottting soil in glass anyway? The trick was to first pour a layer of gravel in the base, then add some potting soil and the two amaryllis. I topped off the design with the vintage silver-and-gold ornaments that came with my $15 vase. A new sort of mulch! When I water the bulbs, it will be carefully, so as not to flood this glass vase (since it has no drainage).
They are gracing our dining room and looking quite lovely. When December and amaryllis season arrive, I always find myself wishing for more of these yummy blooms. So here are some more pics. Please enjoy!

Backyard Bouquets

Wednesday, October 26th, 2011

As some of you may know, I’ve been working on a book about local and seasonal floral design for several years, since 2007 to be precise. My collaborator, photographer David Perry, and I have been using the working title, A Fresh Bouquet.

But that’s all changing now, with a new title from our new publisher, St. Lynn’s Press. The words evoke just the right idea we want to communicate: The 50 Mile Bouquet: Discovering the World of Local, Seasonal, Sustainable Flowers.

Nice, huh? Our publication date is April 2012 and I’ll be writing lots more news about it soon.

Since all I’m doing these days is interviewing flower farmers, eco-couture floral designers and gardeners who grow their own cut flowers, my head is swimming with beautiful blooms.

And somehow in all this flurry of work, I’ve failed to post the out-takes from my floral design story that ran a few months ago in Better Homes & Gardens. So today, I’m taking a moment to get to it.

Backyard Bouquets - in BH&G's July 2011 issue

How great that 7.3 million readers of the July 2011 issue were introduced to the timeless notion of gathering flowers from the garden, a local farmer or a market stand – IN SEASON – and creating a simple, yet sumptuous arrangement that’s of the moment!

I have my editors Eric, Doug and Gayle to thank, because they believed in the idea and created the perfect opportunity for me to fly to Iowa and design a series of bouquets literally out in the field at Howell’s Family Farm.

I shared some of my on-the-scenes location photos last year, but here, finally, are my photos and recipes of the actual arrangements.

Project One

Project One features a rectangular galvanized container, measuring about 5-by-8 inches and about 5 inches tall. This small vessel was perfect for a compact bouquet with two simple ingredients. First, I filled the opening with four or five luscious heads of ‘Limelight’ hydrangea, the stems cut fairly short, say 3 inches long. To fill the spaces between the hydrangea heads and to add contrasting color and texture, I made miniature bunches of ‘Strawberry Fields’ gomphrena by wiring five slender stems with wire so that each bunch could be inserted as if it were a single flower. This is the perfect arrangement to enjoy while it’s fresh and then let it slowly air dry as an everlasting bouquet.

Project Two

Project Two features a tall, square, modern green glass vase with a neck opening that’s smaller than the base. So of course, to make it look abundant and full, I had to create volume and height. The starting flowers here are sultry-looking zinnias from a new seed mix called ‘Queen Red Lime’ – I love the terra cotta, mauve, and reddish blooms with a lime-green center. Once I had those in place, I thought: We need dark foliage. And lucky for me, the folks at Howell’s, like many cut flower growers, have discovered how well basil performs as a cut ingredient – especially purple basil! Think about it: when you harvest basil from your garden and bring it indoors to keep in a jar on your windowsill, have you ever noticed how long those cut stems last? Of course basil is a great cut floral ingredient! The third element here is one of those happy coincidences – common foxtail grass, which some consider a ditch weed, that perfectly echoes the green vase, and catches the late summer sunlight just beautifully. Three simple ingredients in perfect harmony.

Project Three

Project Three is one of my very favorites, because of the mix of colors and textures. Contained in a vintage pitcher, I absolutely love the playful combo of velvety cockscomb (the crested form of Celosia ) with all the lime green contrasting forms. Here’s how I made this bouquet. First, I filled the pitcher with soft greenery, a white mugwort (Artemisia lactiflora) that fills the opening and becomes the supporting structure for all the subsequent stems. Second, I stripped foliage off of 10 maroon and coral-hued cockscomb flowers; then I cut the stems pretty short and inserted each into the fluffy base, making sure that you can’t see the stems showing at all. Third, I added some ‘Green Envy’ zinnias, which echo the pitcher’s green quite nicely. For a sense of movement, as a final touch, I inserted taller stems of quaking grass (Brizia maxima), so they seem to hover above the bouquet. Casual and the epitome of summer!

Two other projects fell on the cutting room floor, so to speak, so you get to see them here! Actually Project Four showed up in the iPad edition, along with a video interview filled with my eco-savvy design tips. You actually have to download the July edition to see the entire interview (filmed by David Perry) on an iPad.

Here’s a rough-cut edit of the video:

httpv://www.youtube.com/watch?v=ZLKacMtjJUY

Project Four

Anyone can replicate Project Four, a fun trio of mini-arrangements, which are displayed in a row or grouped together on the table as a centerpiece. We used three yellow tumblers that art director Scott Johnson brought from his kitchen cupboard. The simple idea was to showcase several varieties of black-eyed Susan flowers (Rudbeckia sp.) with a mix-and-match of foliage choices. The daisy-like Rudbeckia varieties include, from left: ‘Indian Summer’ and ‘Denver Daisy’ with zebra grass (Miscanthus sinensis ‘Zebrinus’); ‘Irish Spring’ with lamb’s ears; and ‘Prairie Sun’ with goldenrod (Solidago). This type of design works well when you only have one or two of anything in bloom at a given time – voila!

Project Five

For Project Five, the last arrangement, I had to rise to the challenge of creating flowers that wouldn’t fall out of the wide, saucer-like bowl. Similar to cutting the hydrangea stems short in the first design, I cut lots of Sedum ‘Autumn Joy’ in their unopened stage. A this point, they still look pretty green because the buds are tight. When you cut the stems short, say at 2-3 inches, you can really cram a lot inside an opening. To me, they almost look like heads of broccoli! But the tightly-packed sedums create a foundation through which other stems can be inserted. And in this case, I inserted old-fashioned love-lies-bleeding (Amaranthus caudatus) and Queen Anne’s lace. The tassels cascade over the edge of the shallow bowl, and while it’s kind of quirky, I really love the effect of textures and colors.

Together, these five designs demonstrate the diversity of the cut flower world – and ways to arrange blooms without using florist foam to stabilize the stems. Have fun playing around with these ideas using your own vases and garden flowers.

When lilacs meet hellebores . . . and play with fritillaries

Friday, April 29th, 2011

A yummy spring bouquet - straight from local farms and fields

 Springtime is embodied in this vase, isn’t it?

Take a visual "whiff" and enjoy this combination of three lovely flowers.

You can almost smell that heady perfume associated with Syringa vulgaris, or the common lilac. To me, the fragrance is associated with my lifelong relationship with flowers. 

We lived in rental house in Connecticut when I was in elementary school; the backyard was home to an overgrown lilac that drew me to its blossoms (we loved playing underneath the flower-laden branches and smelling spring). 

Later, when I was a teenager, I remember secretly harvesting armloads at a city park and carrying them to school in May, as if I was in a pageant! 

When we planted our former Seattle garden in the late 1990s, I asked my friend Karen to select a lilac for the border. She chose one called ‘Sensation’ – it has deep purple florets and each petal is rimmed in white. That shrub never disappointed. . . and I waited for its blooms each year until we moved away. 

And most recently, while living in Southern California, I nearly fainted when I happened upon a lilac farmer at my local market. I was so fascinated to learn lilacs can grow there at a high elevations, such as in Lancaster, Calif., north of LA. I even had to run back to my car for my camera so I could interview her about those unforgettable flowers

Another closeup - I can't resist!

Today’s bouquet features the addition of several Jadeite-green garden hellebores and a few sultry plum-and-yellow Fritillaria assyriaca. These companions turn two bunches of just-cut lilacs into a sweet bouquet for my fireplace mantel. 

And the best thing about these blooms? They’re from local Northwest flower farmers – yeah! 

The lilacs were grown by Oregon Coastal Flowers in Tillamook, Ore. 

The hellebores were grown by Jello Mold Farm in Mt. Vernon, Wash. 

The fritillarias were grown by Choice Bulb Farms in Mt. Vernon, Wash. Check out David Perry’s gorgeous still life of this unusual flower at our blog, A Fresh Bouquet

If you’re a floral, event or wedding designer, be sure to meet these fabulous farmers at Seattle Wholesale Growers Market. If you’re a customer, be sure to ask your designer to patronize this amazing cooperative of local growers. Their motto is awesome: From Farm to Florist.

Here’s a link to a little post and gallery from my visit earlier this week.

Inspiration comes in many forms

Wednesday, March 30th, 2011

A spring bouquet in a Mason Jar inspires . . .

The other day, while talking with my friend Lorene (one of the most creative people I have known since we were college classmates together), I described some of the cool design ideas I’ve spotted in the past few weeks. My own enthusiasm for all this visual stimulation made me realize my “list” could be a blog post here.

After seeing these ideas in Seattle, Los Angeles and New York, my own idea-bank has been rekindled. Witnessing the talent of others doesn’t ever make me envious. No, it makes me want to up my own game and push myself further to do something wonderfully better as a writer, a gardener, a designer.

The type of inspiration I’ve seen lately has been truly exquisite. Great design is great design, whether in the garden, the home, or the restaurant. When you see it, you know it!

There may be no other response than to gaze in awe and say – WOW. But if your muse can be stirred or awakened by these ideas, by all means, use them as a starting point for your own artistic expression. I hope you enjoy where all this beauty takes you!

A TEENAGER WINS

17-year-old garden designer Courtney Goetz won a Gold Medal at the Northwest Flower & Garden Show. Her mom, designer and writer Sue Goetz, is one of her influences.

At last month’s Northwest Flower & Garden Show, one of my most favorite annual events, I was invited by Julie Chai of Sunset Magazine to help “judge” the Sunset Outdoor Living Award.

We were smitten by a small but extremely innovative garden called “Paradise (to be) Regained . . . borrowing Thoreau,” which we honored with the Sunset award.

The critera recognizes a garden that exemplifies “fresh, useful and achievable ideas.” In this instance, the designer was 17-year-old Courtney Goetz.

Courtney, the daughter of garden designer and writer Sue Goetz, grew up in the garden-making business. In 2005, when she was 11, Courtney helped mom Sue design a display garden named “A Child of the Garden Grows .  .  .  .” for this same show. Now, she has made a garden herself – and guess what? In addition to the Sunset Award, the show judges honored Courtney with a Gold Medal.

This half-circle garden floor treatment by Courtney Goetz shows how to pair salvaged metal grates with colorful groundcovers to create a "welcome mat" at the entry to a garden shelter.

As her Senior Thesis Project for Gig Harbor High School, Courtney wanted her design to be all about “recycling, re-purposing, and ‘re-characterizing’ used materials for use in the garden,” she says. “My goal and intent for this garden is to have green ideas for everyone to instill in their lives. I want the message to get out that not everyone can buy solar panels or hybrid cars, but anyone can and will make a difference by using a little bit less and utilizing what we already have.”

One of the many wonderful – and really clever — details of Courtney’s display garden was the checkerboard “floor” treatment, combining recycled metal grates with ground covers and rocks.

We loved this idea as a modern twist on a “welcome mat.” Courtney selected varieties of sedum and sempervivums in gold and dark green, as well as smooth rocks and the metal grates. It all adds up to a really gorgeous detail in the garden.

Look for exciting things to come from this young talent. We can’t wait to see more!

ROUGH AND SMOOTH TEXTURES

Openings between each paver makes room for a permeable detail of smoth stones.

Design detail

Another wonderful “floor” treatment appeared in a garden called “Wrinkle in Time,” designed by Karen Stefonick of Karen Stefonick Design. Her garden won the Best in Show Award, also called the “Founder’s Cup.”

Since I was able to tour it up close during the judging, I realized how truly creative Karen is when it comes to working with landscaping materials. She devised a patio using two simple ingredients: Concrete Pavers and Tumbled Stone.

Look closely at this pattern created by the slightly offset 1-by-2 foot concrete pavers. By staggering their placement and filling a 2-inch gap at either end of each paver with small rocks, Karen has accomplished two things.

First, she uses the texture of stone to contrast with the smooth concrete, which results in an attractive pattern. Second, this treatment turns a patio into a permeable surface for collecting rainwater into the ground rather than allowing it to stream down to the curb and disappear. Very cool!

BIRTHDAY BOUQUET

What a gorgeous grouping of flowers and vases!

During all the Flower Show activity, including giving three talks in two days, I almost forgot to celebrate my birthday. But thankfully, my friends and family didn’t forget.

Flower detail

One of the best surprises was the delivery of flowers from a local West Seattle shop called Fleurt Studio.

The gift-giver was my sister-in-law Sandra B. Henriquez. Her touching gesture of sending flowers was made more amazing because instead of resorting to the generic, 1-800 route, Sandi did her homework to find a local flower shop that offers unique, one-of-a-kind gift bouquets. She called (long-distance from Washington, DC) and spoke with Samantha, the owner, and discussed exactly what would be included in the delivery.

And here’s what arrived: A “floralscape,” an eclectic grouping of five differently-sized vases holding mostly purple and plum ingredients. I loved the whimsical inclusion of two canning jars, a bud vase, a vintage bottle and a miniature glass cup. Together, they created a floral display that no single bunch could equal. Magical, huh?

LOS ANGELES VIBE

Stunning!

After February’s Flower Show madness, March welcomed a trip to Los Angeles, my former home town. Living there for the past four years was an amazing adventure, especially when it comes to learning about design with new eyes. The city, and in fact all of Southern California, was for me a big design graduate school – with lessons in architecture, industrial design, sculpture and history.

While living in LA, I spent a lot of time scouting homes and gardens for the Los Angeles Times HOME section, as well as visiting retail sources for plants, furniture, gardening accents and more.

Rolling Greens Nursery in Hollywood is one of my favorite haunts. It was the site of our Garden Design magazine Hollywood Issue party last April – one of those exciting moments when I said to myself: I can’t believe I’m living here and doing this type of work I love!

Teabags, thousands of them!

When I returned to LA last week to work on a photo shoot for Better Homes & Gardens, I took our art director Scott Johnson to visit Rolling Greens. I wanted him to see several of the area’s cool nurseries. We stocked up on some plants for the next day’s shoot, and poked around buying ourselves tiny agaves to bring home to our colder climes (Seattle for me; Des Moines, Iowa, for Scott – yes, I know. It’s really futile, but we try).

But the wow-factor occurred when I walked into the large space where cookbooks and culinary/gourmet products are typically sold. There along the far wall hung a new installation that I can only describe as a Tea Bag Curtain. One of the staffers told me that the artful treatment had just been hung by Rolling Greens creative director Angela Hicks and her crew.

Hundreds (maybe thousands!) of hand-dyed tea bags, attached to long strings create a beautiful semitransparent cascade, suspended from rods attached at the ceiling. I can only imagine how much time and care was taken to create this rosy-melon masterpiece.

Organic and delicate, this “curtain” is so charming. I am eager to figure out how to replicate it somehow. Simple ingredients paired with masterful execution . . . it adds up to something truly remarkable. This Tea Bag Curtain isn’t “selling product,” but who cares? It goes miles at saying to Rolling Greens customers: we care about design and we’re a place where you can be inspired.

ON TO NEW YORK CITY

Anthropologie's lavish zipper gown - look close and see how it was made with straight pins!

Here's how the crushed paper skirt emerges from the tight, pastel-colored bodice....

Only days after spending 48 hours in Los Angeles, I flew to New York City. I’ve previously written about visiting the awesome High Line Park, but here’s another visual treat, shown purely for its beauty and innovation.

I turned the corner on my way to the Chelsea Market, a huge warehouse-turned-hipster food mall, and there on the corner was a gorgeous Anthropologie window display.

Some super-creative designer turned a dressmaker’s form, yards of zippers, straight pins and crushed butcher paper into a fanciful ball gown. The way the separated zippers form the bodice so the gold and silver metallic zipper teeth sparkle in the light . . . dazzling. But at the top of each zipper, the “end” has been spiraled into a little rosette.

Just take a look and feast your eyes on the charming way a few simple ingredients become Cinderella’s new gown!

Now, go out and do something uninhibited and artistic today. I dare you! I’m going to try it myself.

Bouquet-making with spring bulbs

Friday, March 4th, 2011

A textural display of two colors of tulips with curly willow and camellia buds on stems fill this vintage green urn.

The Northwest Flower & Garden Show, the country’s second-largest indoor flower show, was staged last week. It was a great show and I’m sure I’ll be posting future stories about some of the wonderful design ideas, plants and speakers that inspired me. But right now I want to show off some of my floral design projects with simple instructions. The arrangements are from my talk and demonstration last Thursday on the Smith & Hawken DIY Stage. 

Here in Seattle the crocuses and snowdrops are only just now blooming. Daffodil foliage is just a few inches out of the soil. So my talk on “Floral Design with Spring Bulbs” was geared to the flower-lover who seeks out local blooms from growers in his or her own backyard. 

One such grower is Alm Hill Gardens, owned by Gretchen and Ben Hoyt. You can find Alm Hill flowering bulbs and other cool crops like lilacs and peonies year-round at the Pike Place Market and at weekly outdoor farmer’s markets including Ballard, University District and West Seattle.  I encourage you to always ask questions about where and how the flowers you buy were raised. There is nothing better than meeting the farmer who actually grew your bouquet.  

Fun on the Smith & Hawken DIY Stage

For a few weeks prior to last week’s flower show I had fun playing with tulips, daffodils and narcissuses, and hyacinth flowers to come up with the techniques I wanted to teach. 

The detail photos you see here are from those samples, so the tulips (sadly) are not Alm Hill’s, although they are still fresh and locally grown. During my demonstration I was too busy to stop and photograph each project, but perhaps someone who attended will surprise me with their pics, as my friend Lorene Edwards Forkner did yesterday when she showed up with a CD of a few photos from the talk (THANK YOU!). 

For each of these projects, my goal was to use an organic method of stabilize the blooms, rather than the conventional green foam blocks called “florist oasis.” That product, I have learned, is a carcinogen that contains formaldehyde (why would you want to touch or breath it?); and furthermore, it does not break down in landfills. I do understand why designers have used it for years. So far, there really isn’t an organic alternative to organizing and arranging flower stems to maintain the perfect form or angle. Yet increasingly, I am meeting and interviewing floral designers who consciously shun the green foam and use alternate materials to stabilize flower stems.

Here's a selection of my flower-stabilizing options, including lots of vintage glass and metal "frogs"

Here are a few options: 

  1. Pebbles, sand, gravel or marbles in the  base of a vase
  2. Pliable twigs wrapped around the inside of a vase to create a basket weave-like framework. One designer who David Perry and I interviewed uses shredded wood shavings called Excelsior inside her vases. This is the type of material used to ship wine bottles, and it’s biodegradable.
  3. Good, old-fashioned flower frogs in ceramic, glass or metal. I’ve been picking these up for a few bucks at weekend flea-markets. One of my favorite is a half-dome cage. It is heavy so it sinks to the bottom of the vase; and it has 3/4-inch square openings, which is ideal for woody stems. These are the arranging tools of the past, seriously useful for the present!
  4. Foliage. I often start an arrangement using soft, fluffy foliage as the “base” that peeks out over the top of the rim. For winter/early spring arrangements, Dusty Miller is a nifty option. It is lacy and soft – and it lasts for up to 2 weeks in water once cut. Once you fill the vase with the foliage, all the other flower stems can poke through the foliage and they will remain in place.
  5. Balled up chicken wire is another time-honored trick for stabilizing especially larger arrangements. It also works well for wide-mouthed vases. Get a roll at the hardware store (my local hardware store told me the proper name for this stuff is “Poultry Cloth” – whatever). You will need use wire cutters to trim off the length you want. Use gloves to protect your hands from wire scratches and create an open “ball.” After inserting into the container, make sure that a portion of the wire emerges above the rim so your design looks fuller.

All these fresh spring details play so well together, especially the sprouting willow branches and the camellia buds.

Design One:  Tulips (2 colors) with curly willow and camellia buds. I used a 4-1/2-inch diameter x 2-inch high dome-style metal flower frog in a vintage lime-green urn with handles.

  • Note that the curly willow is starting to sprout tiny green leaves. That’s what happens when willow stands in H20 for a few weeks inside a warm home.
  • As for the camellias, these are branches left over from a photo shoot last month. The dried leaves were crunchy and unattractive, but the buds were plump and interestingly shaped. So I grabbed my floral shears and clipped away the leaves. The chubby buds on the branches are a nice architectural accent.
  • I first inserted the willow and the camellia branches, forming an open “nest.”
  • Next, I inserted 10 red tulips, cutting their stems short so the flowers are close to the opening of my vase.
  • Finally, I added the yellow tulips, cutting the stems longer. You will note that none of the short or tall tulips are the same height. I like to stagger them so there is a less formal feeling to the design. As I inserted the tulips, I used the framework of the branches to also help support their flowerheads, especially the tall ones.

Flower stems, shrub twigs, pebbles and twine. Deceptively simple!

Design Two: Daffodils and red-twig dogwood branches. I used a 6-by-6-by-6 inch glass “cube” vase and filled the bottom 1/4 with medium-sized pebbles. 

  • The inspiration for this design comes from a Winter 2008 edition of by Design, which is published by The Flower Arranging Study Group  of the Garden Club of America. In the article, Cres Motzi demonstrated a way to layer a row of cut branches over the opening of a rectangular container and “strap” them on with twine to create a framework for inserting branches. Her design also used floral foam inside the container, but I find that completely unnecessary here.
  • Detail of the twigs as they are strapped onto the vase.

    I cut 9-inch lengths of pinkish dogwood branches, lining them up in parallel rows across the opening of the vase. Available at craft stores like Michael’s, twine-wrapped wire is an ideal material to strap around the bottom of the glass vase and over the twig arrangement. It can be twisted taut and secure. There is a band of twine on either end of the twig arrangement.

  • This design is so simple and serene that it called for a singular flower. Fifteen just-picked daffodil stems look great here. I inserted them into openings between twigs and twine, staggering them in an informal arrangement. You can see how well these stems stay upright, aided by the pebbles in the base of the vase.

Shades of white, silver and pewter make for a pretty wintry floral palette.

Design Three:  Hyacinths, Dusty Miller and pussy willow branches in a vintage oval vase. Here, the Dusty Miller foliage is the stabilizing element for the other stems. The vase is a 6-inch high vintage 1940s piece. The opening is an oval, approximately 7 inches long x 4 inches wide. I love this vase! It came from a visit to Old Goat Farm in Orting, Wash., owned by my friends Greg Graves and Gary Waller. Their nursery and shop is filled with surprises, including some vintage pieces like this.

  • Even here in the dead of winter, good old Dusty Miller (Senecio cineraria), a shrubby perennial from the Mediterranean region, is holding its own. Gray and kind of ubiquitous the rest of the year, Dusty comes in handy when one needs a soft foliage ingredient to contrast with darker greens. I robbed this batch (with permission) from my friend Nancy Finnerty’s Madison Park garden two weeks before I used it in the flower show demo. This stuff is pretty ironclad. Cut the stems as long as possible and start filling up the vase with them. The leaves are deeply cut and lobed; when used in a floral arrangement, they take on a lacy profile.
  • Insert 5 or 7 long-stemmed hyacinth flowers. Right now, Alm Hill Gardens is selling

    Ready for a close up!

    creamy white, dark pink and deep purple varieties – and the scent is truly intoxicating! Gretchen explains that she gets the longer-than-normal stems by starting the bulbs in the dark. Those poor babies are reaching for light during their growth phase, so that’s why their stems are much longer than the ones you or I would grow in the ground. Pretty gorgeous stuff. Again, notice that the stem lengths are staggered.

  • Finally, insert 7 or 9 pussy willow branches, also at varying heights. These are from a grower in Oregon and I like how they resemble floral exclamation points in this wintry white arrangement. This design is long-lasting. If the hyacinths decline (yet they still look great and this arrangement has been finished for 8 days!), you can always replace them, cuz the pussy willow and Dusty Miller will keep on keepin’ on for at least twice as long.

During my demonstration, I was so pleased that Gretchen Hoyt was in attendance with her assistant, as well as several other seasoned growers and designers – and they offered lots of suggestions and tips. One tip from Lorene’s bag of tricks os how to refresh H20 in a vase with so many complicated parts like the branched framework and the curly willow. Her technique is to first put the vase in the kitchen sink. Using the spray nozzle on the faucet, gently spray fresh water into the vase until the existing H20 starts spilling up and over the edge. If you continue for a minute or so, you will have completely replaced old, dirty water, with new, fresh water. Voila!

I'm working with locally-grown flowers and garden ingredients at the Northwest Flower & Garden Show.

If you are wondering about some of my other resources you see, here is a list:

  • Smith & Hawken copper watering can and other accessories are now available exclusively through Target stores.
  • The wonderful canvas work apron I’m wearing (right) was designed by my friend Janna Lufkin, who is a popular home organizing authority and stylist for Better Homes & Gardens and other outlets. Janna’s products are made locally in Seattle and available through her blog Be it Ever so Humble.
  • Tulips in February, grown locally in Northwest Washington by Alm Hill Gardens.

    Alm Hill Gardens can also be contacted for tulip deliveries. You can order any number of stems (there is a one-dozen minimum) of your favorite tulip colors and have them shipped via overnight or 2nd-day air.

  • To order or for more information, contact Alm Hill at almhillgardens@gmail.com or call toll-free at 855-ALM-HILL (855-256-4455). I took lots of photographs at their Pike Place Market booth last week and thought I’d share some of the yummy shapes and colors of these fresh, local and sustainably grown blooms. 

Finally, a special thank you to my partner-in-flowers, David Perry. The projects you see here will be featured in our forthcoming book, A Fresh Bouquet. And I can promise you that the photos he takes will be dazzling beyond belief.

We invite you to follow along with us on this journey at our blog, A Fresh Bouquet.

A winter bouquet: arranging flowers from the January garden

Sunday, January 9th, 2011


By borrowing this lovely cream urn from my friend Lorene, and by clipping ingredients from her garden and that of Jean Zaputil's, I created a dramatic winter bouquet.

Earlier this week, my collaborator David Perry and I were the “program” for Woodinville Garden Club’s first meeting of 2011. It was an auspicious beginning for what we anticipate to be a great year gathering stories both visually and with words for our book project, A Fresh Bouquet.

Frequently, the feedback to our “seasonal, local and sustainable” mantra has to do with the argument that one can only follow this practice in the peak growing seasons when annuals and perennials are in their glory (you know what we mean – roses, peonies, dahlias, even sunflowers….they don’t usually sing in January!)

That’s true, but living in the seasons means that of course you don’t want a vase filled with August bloomers in the dead of winter. That’s like eating a mealy hothouse tomato out of season. Yes, it’s red in color, but that’s about as much in common the January grocery store tomato has with the off-the-vine, warm, juicy, flavorful heirloom you grow in the garden and add to your late summer salads.

So after our illustrated lecture on “A Year in Flowers,” featuring some pretty incredible images that Dave has captured on our joint and his solo excursions, we set out to design and demonstrate some great ideas for winter bouquets. Suffice it to say, David created an uniquely “David” arrangement. Yes, it involved power tools and an unexpected combination of leaves and blooms. When he blogs about it, I’ll add the link here.

This detail shot shows how the oakleaf hydrangea adds wine to the bouquet, showcased against the hellebore foliage; a glimpse of the yellow-and-green acuba foliage is in the upper right corner.

For me, I wanted to fill a vase with winter beauty. Some of you may know that our family is in a bit of transition. We finally sold our house in Southern California, but we are still living in a rental house in Seattle, while house- and garden-hunting for a permanent residence.

I yearn for my previous Seattle garden where I could gather more than enough ingredients for any impromptu bouquet (does this come close to admitting that I’m an over-planter? YES! But I don’t own that garden anymore, sadly). I’m a bit limited with the offerings at our rental house and I don’t want to denude all the plants my landlords consider theirs!

So, on Tuesday, I went “flower shopping,” which means I visited the amazing gardens of two friends, clippers in hand. It was sunny out, and very cold. Some of the shrubs showed signs of frost damage. After all, It was January 4th! But I was not disappointed and my garden designer friend Jean Zaputil walked me around her backyard and entry garden, encouraging me to take a little of this and a little of that.

Her bounty included Fatsia, which has huge, palm-like foliage. Green and glossy, this is good stuff – perfect for adding drama to a vase. We clippped branches of green Boxwood, another hardworking shrub that is just as hardworking in an arrangement. Oh, and the Sarcococca, or sweet box – divine. If you have never grown this evergreen shrub, which has little pointed leaves and hard-to-see, super fragrant white winter flowers, think about planting it now. It’s hardy in the Pacific NW….not in the midwest, unfortunately, according to my friend Danielle.

I also left with a few stems from Jean’s Acuba shrub, which is another one of those plants you sometimes ignore in the summertime when everything else looks so swell. But even the famed Christopher Lloyd admired this plant – its bright yellow foliage is splashed with green flecks. And there’s nothing like something golden to offset all that greenery. It ended up as one of the magical ingredients that perked up my bouquet. I also talked Jean into letting me clip two branches from her about-to-bloom Helleborus argutifolia – with its leathery, serrated, olive-green foliage and the pale green flower in bud.

Here's how the honeysuckle vine looks, wrapping around the base of the urn.

After leaving Jean’s, I headed to Lorene Edwards Forkner, plantswoman, designer, blogger and fellow writer — another incredibly talented friend (I am blessed with many of them!). Lorene’s garden is very close to Puget Sound, which is often a bit milder than the rest of Seattle. That’s the only reason I can come up with to explain why her Oakleaf Hydrangea shrub was still hanging onto several deep burgundy leaves in pretty sets.

Like the golden Acuba, the wine-colored Hydrangea foliage added great contrast to the bouquet. Oh- and the ‘Jelena’ witch hazel – yes, this glorious, fragrant shrub is just beginning to flower in Lorene’s front yard, so she allowed me to clip a few branches. The blooms of the witch hazel are little puffs of burgundy-copper – and it doesn’t take many of them to perfume a room. I made this bouquet on Tuesday and four days later, the dining area where I set the urn was still heady with the scent.

You can look closely to see most of these ingredients in the photos here. One more thing I want to share about this abundant bouquet. Notice the draping vine? That’s a cascading and twining length of a rugged honeysuckle, also from Lorene’s property. I wanted it to spill elegantly from the mouth of the cream-colored urn, but it was a little too stiff to give me the look I envisioned. So I started wrapping it around the base of the urn and – well, that looked better. I employed a trick I learned from a Portland floral designer we recently interviewed, Jennie Greene. She uses tiny lengths of twine-wrapped wire to secure branches and stems in place. Easy t0 find at craft stores, I pulled out a roll of the wire, cut off a couple inches and secured the honeysuckle in place.

Now who says there’s nothing to put in a vase in January? This creation illustrates just one way to gather from the winter garden. Go see what you can create!

Autumn window boxes

Saturday, October 23rd, 2010

Ornamental cabbages and kales are all it takes to make some pretty cool fall window boxes.

Understanding “scale” is one of the most challenging of all design principles. So is finding just the right plant combo to fill a series of ginormous window boxes.

Jayson Home & Garden - a Chicago discovery for all the things I love

So imagine my delight at seeing a great example of both while visiting my college-freshman son in Chicago last month. While waiting for him to get out of class, I filled my free time touring the city’s uber-hip Lincoln Park neighborhood. That’s when I drove by Jayson Home & Garden.

A savvy retailer-friend in Seattle had told me about this must-visit shop that specializes in European-inspired home furnishings, antiques, accessories, tabletop and plants. . . so I slammed on the brakes of the rental car and took a tour – inside and out.

Jayson Home & Garden occupies a large, vintage warehouse on Clybourn Avenue. Since the building is located on a corner, there are many huge  windows that wrap both sides of it. Each window is about 4-feet wide and is adorned with an accompanying window box. You can see why any other autumn flowering favorite, such as a mum or pansy, could disappear in these deep, super-sized planter boxes.

I took this photo from across the street - see how dramatic the window boxes look with the large green-purple heads of cabbage and kale?

So here’s where the scale equation works brilliantly.

These boxes are planted with two forms of ornamental cabbage and kale. That’s it.

Packed tightly with alternating ruffled and rounded plant shapes, the design is simple and makes a big impact while filling no fewer than six of the massive boxes. I also love the way the designs anchor the tall windows and elevate something living halfway up the sides of the store’s exterior.

Check it out!

The next time you’re at the grocery store or garden center, pick up a few pots of these decorative plants.

You can experiment to see how well they add volume, scale and seasonal interest to window boxes, planters or containers.

Floral design – straight from the field

Saturday, October 2nd, 2010

Even the Monarchs were willing to be photographed at the flower farm.

In a glorious Iowa field, I gathered flowers for my bouquets.

One knows she’s in relationship trouble when her own mother and dear friend Susan, who was her maid-of-honor in 1984, call to say, “I haven’t heard from you for a while, so I checked your blog to see what you have been up to.”

Umm. I’ve been on the road a lot lately. Way too much on the road for my liking. Being away from home and traveling for 15 of the 30 days in the month of September was ridiculous, but (I guess) necessary. Anyway, for the first time in three years, I went for a full month without posting an entry on this blog. Yikes!

There were many blog posts composed in my mind as an idea or notion would occur to me. “I should write that down,” I thought. But then, the droning lull of the airplane engine would convince me a quick “up in the air” nap was in order. Or I didn’t have access to the Internet. Or something like a deadline for a volunteer project or even – wow – a paying project . .  or someone else’s needs that were way more pressing came along.

So here we are in October – how apropos. The new leaf is turned. I don’t have to travel again until Oct. 12th and that is a single overnight jaunt for a photo shoot in Bellingham, 100 miles to the north.

Seriously, I should be able to squeeze in some news, insights, ideas, GARDENS, cool FLOWERS, and more between now and then.

The story I want to share here is from September 14-16. After six full and intense days for the annual Garden Writers Association Symposium in Dallas, I jumped on a tiny airplane and flew to Des Moines. I met up with the team I collaborate with at Better Homes & Gardens magazine. Eric Liskey (deputy garden editor), Jane McKeon (associate garden editor) and Scott Johnson (deputy art director) and I were up to our knees in flowers.

A view across the flower fields at Howell's Farm in Iowa. Isn't this just the most perfect cloud-filled sky you've ever seen?

Globe amaranth (Gomphrena sp.)

The flowers – ingredients for a how-to story on creating bouquets from field-grown arrangements – were in all their glory at Howell’s Farm.

Based in Cumming, Iowa (in Madison County – yes, where the bridges are!), Howell’s is a sixth-generation family farm. After decades of raising corn and other agricultural crops, current owners Fred Howell and family began in 1985 to grow everlasting flowers.

Today, the farm is an 800-acre destination for people in search of the best varieties of decorative and seasonal crops. In the spring, summer and fall that means people come for the huge variety of annual and perennial flowers, herbs and grasses for cutting and drying. In the fall, they enjoy the amazing pumpkin patch and a cool corn maze. By the end of the year, in the winter, it’s the Christmas trees as main attraction.

After I landed in Des Moines, Eric and I drove out to Howell’s, about 25 miles outside of Des Moines, on a breezy, but gorgeous afternoon. Scott met us there and the three of us followed Erin Howell, Fred’s daughter, on a walk through the five-acre flower fields. As is my typical reaction whenever I visit a flower-growing operation, I was practically hyperventilating with excitement.

Celosia, plume type - what a great color!

This shows how windy it was as Eric (left) and Scott (right) held the oversized "silk" to cast a shadow for one of the bouquet vignettes.

The variety of flower form, color and vigor in Howell’s crops was dazzling. The setting itself was breathtaking. We talked through our options of ingredients, including what “design lessons” we wanted to illustrate in the story, what sizes and shapes of vases we needed to use, and how to CHOOSE among all the great flowers that seemed to say “pick me, pick me!”

Back at the editorial offices, the three of us huddled with Jane to talk about the floral design projects we wanted to assemble and photograph the following day. This was no small task. Everything has to be mapped out so we could envision how things will look on the pages of Better Homes & Gardens.

The sheets on Scott’s clip-board featured his sketches of mini-magazine pages, complete with thumbnails of vases, blooms and notes to show how a four-page flower arranging story might look. We had to think about a color palette for the vases, taking into consideration the textures and hues of each flower lesson. Then Scott raced out to pick up props from all his secret sources (including tables, stands, vases, pitchers, etc.) and Eric and I took a drive over to his personal garden. We needed a few extra plant ingredients to enhance the designs we had in mind, so Eric obligingly let me cut some lambs’ ears and goldenrod from his borders. What else? Oh! a visit to the mall to pick up a denim shirt for me to wear in the photo shoot.

BH&G staff photographer Blaine Moats wanted the perfect Monarch shot. He actually got dozens of perfect shots because the butterflies were amazingly cooperative.

Yes, there it is: Francesca's House

The next morning arrived bright and early and we met out at Howell’s around 7 a.m. Since Jane and I had designed the first two looks the afternoon before, we had a jump start for the photography. But then, the light seemed pretty good for a portrait, so Scott sent me out to cut flowers while our photographer Blaine Moats shot away.  As I walked between the rows of marigolds, zinnias, sunflowers and milkweed, filling my galvanized French flower buckets with stems, I thought: How lucky can a gal get? It was a joyous experience to just be there, to know that I was getting to create bouquets and arrangements that will be featured in the magazine sometime next summer, and to work with such talented, artistic colleagues.

We were soon distracted by a sight so compelling and awe-inspiring that we simply had to stop working. Well, except for Blaine, who just turned his lens on the scene and began to document it. A harmonic convergence of Monarch butterflies was waking up as the day began to warm. They seemed to want to pose for photos, since even I was able to capture some really sweet butterfly portraits as the winged creatures breakfasted on the nectar of hot pink “Kiss-me-over-the-garden-gate” flowers (aka Polygonum orientale).

Milkweed with Monarchs (Asclepias sp.)

Me again - can't stay away from those blooms!

If that wasn’t thrilling enough, by the time Jane McKeon arrived in the afternoon, I had another amazing sight.

“Look over there,” Jane said, gesturing to a distant and lonely farmhouse. “Do you know that it’s Francesca’s house?” Yes, this was the actual Iowa farmhouse used by Meryl Streep’s character Francesca Johnson in the famous film “Bridges of Madison County.”

Another reason to visit Howell’s Farm is to gaze across rows of flowers and see that setting. I may have to rent the film just to see that house on the screen, and to appreciate Meryl’s Oscar-nominated performance from 1995.

There’s lots more to share but my bouquet designs are embargoed until they show up in the magazine. I can’t wait to show them off to you.